
How to build an NFT series using AI (Part 8)
ICYMI: Chevy is feeding his original photos to an AI to create an NFT series (and documenting it all here). Follow on IG and Twitter for first looks.
Alright, playtime is over. The grunt work begins.
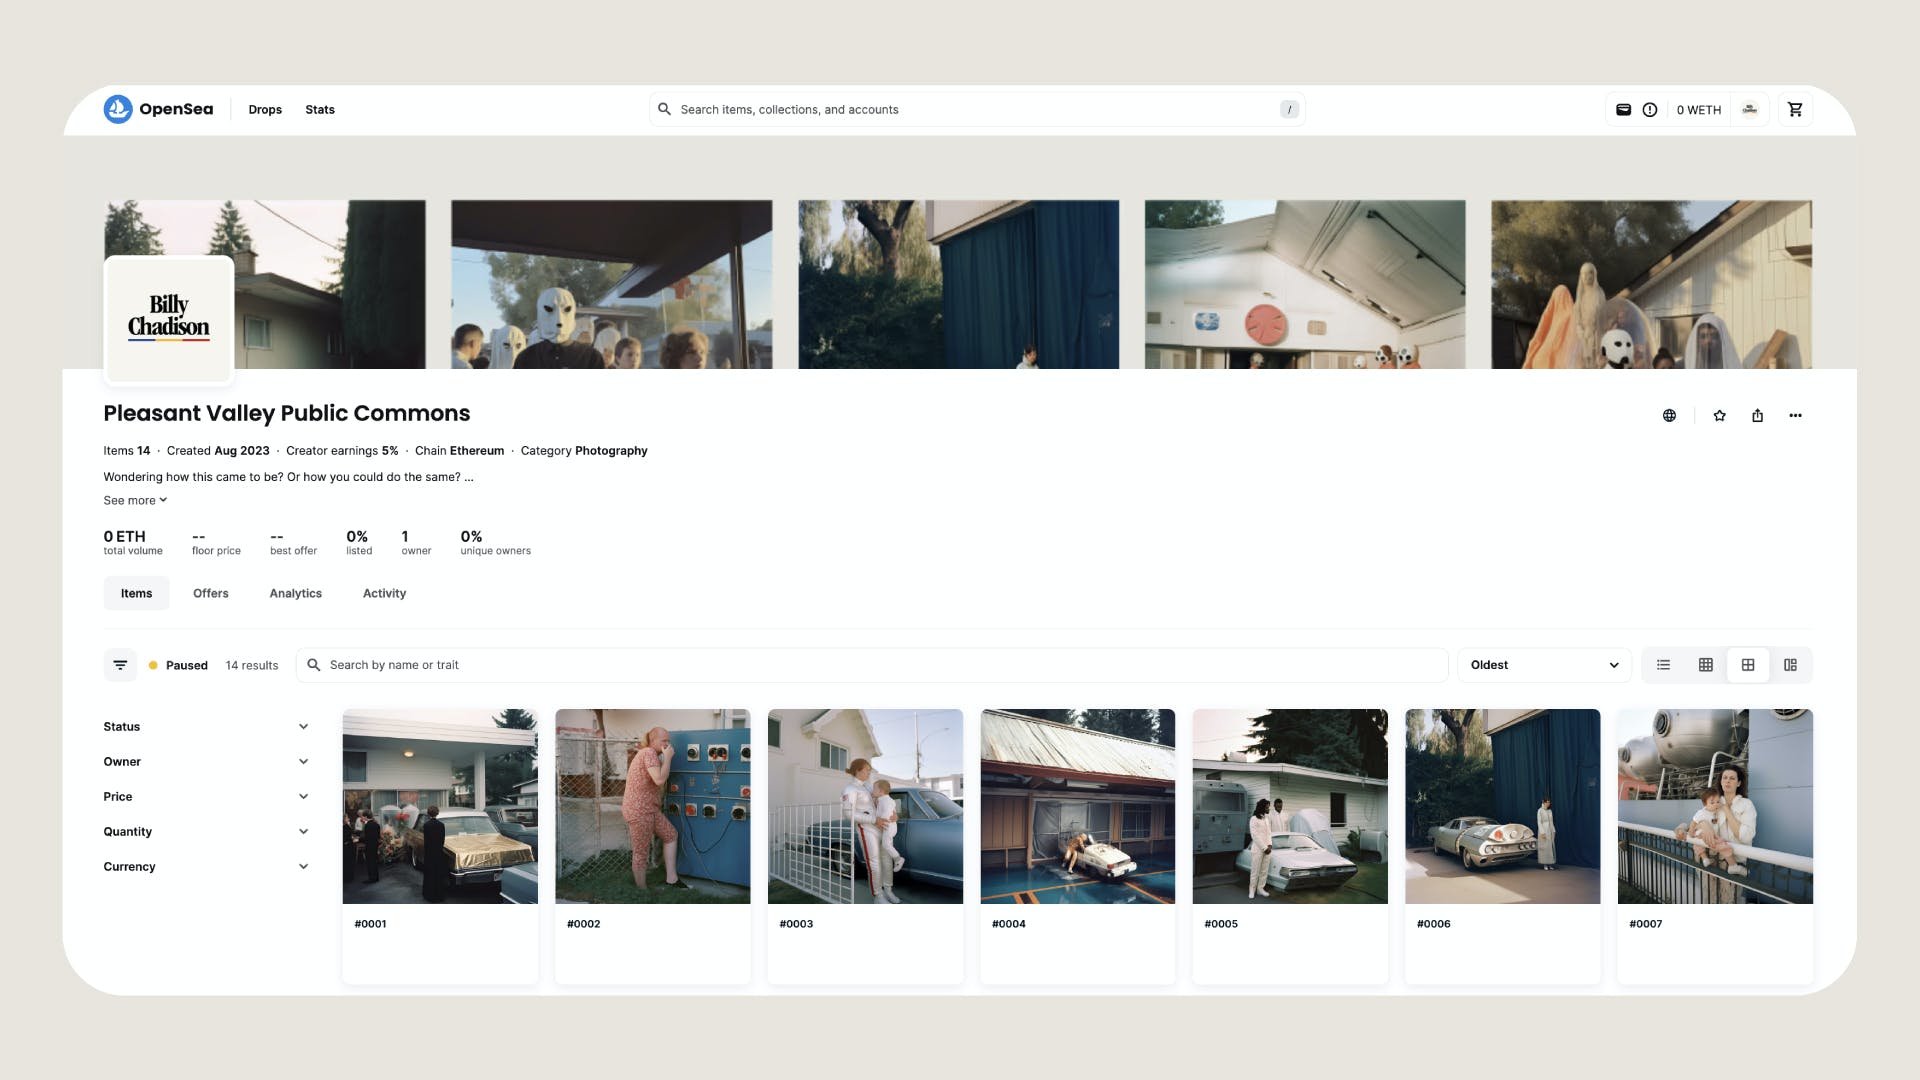
Today I built out Billy Chadison’s collection on OpenSea.
Here’re the ten steps I took to get’er done:
1. Logged in to MetaMask (here’s how to set one up if you don’t already have one)
2. Went to Opensea.io and clicked ‘Connect wallet’ in the upper right
3. Clicked the profile icon in the upper right
4. Selected ‘My collections’
5. Chose ‘Use OpenSea contract’

6. Filled out:
Collection Details
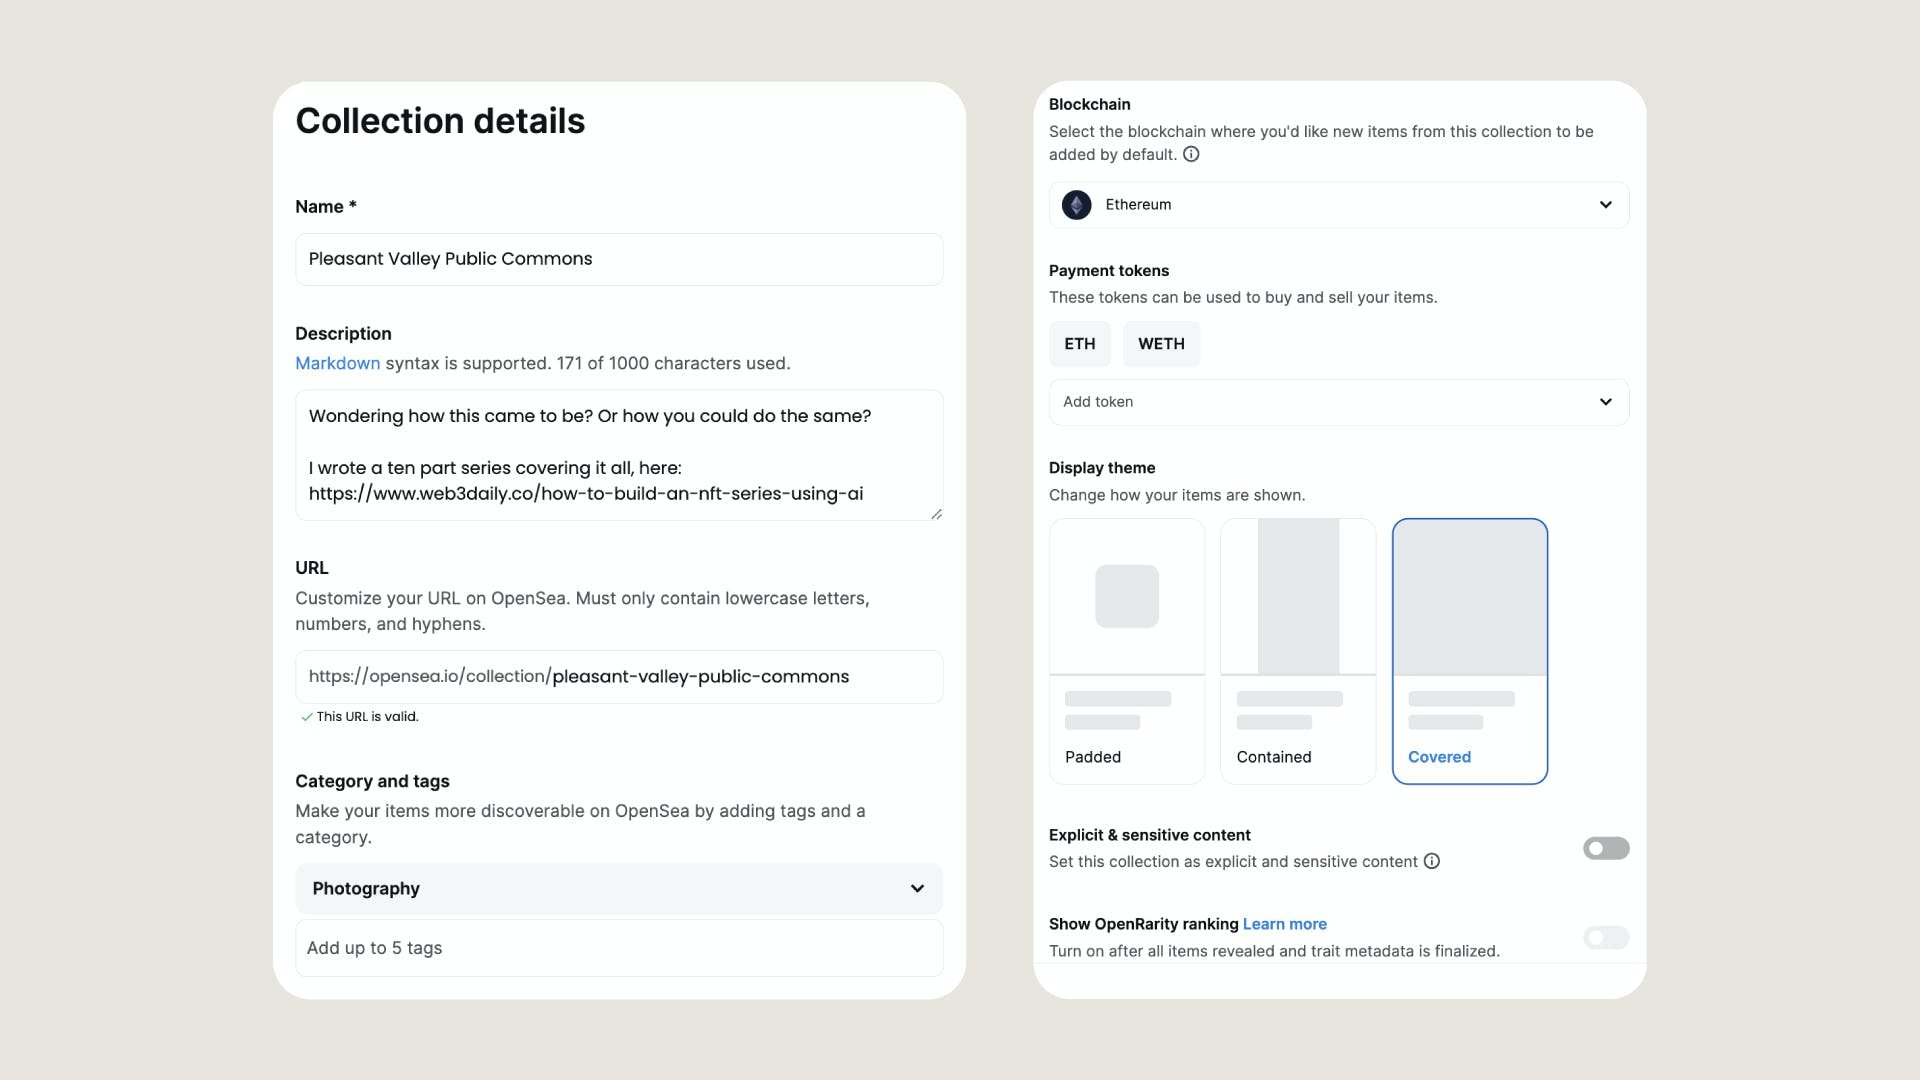
I'm calling the series 'Pleasant Valley Public Commons.' Why? Idk, sounds cool ¯\_(ツ)_/¯
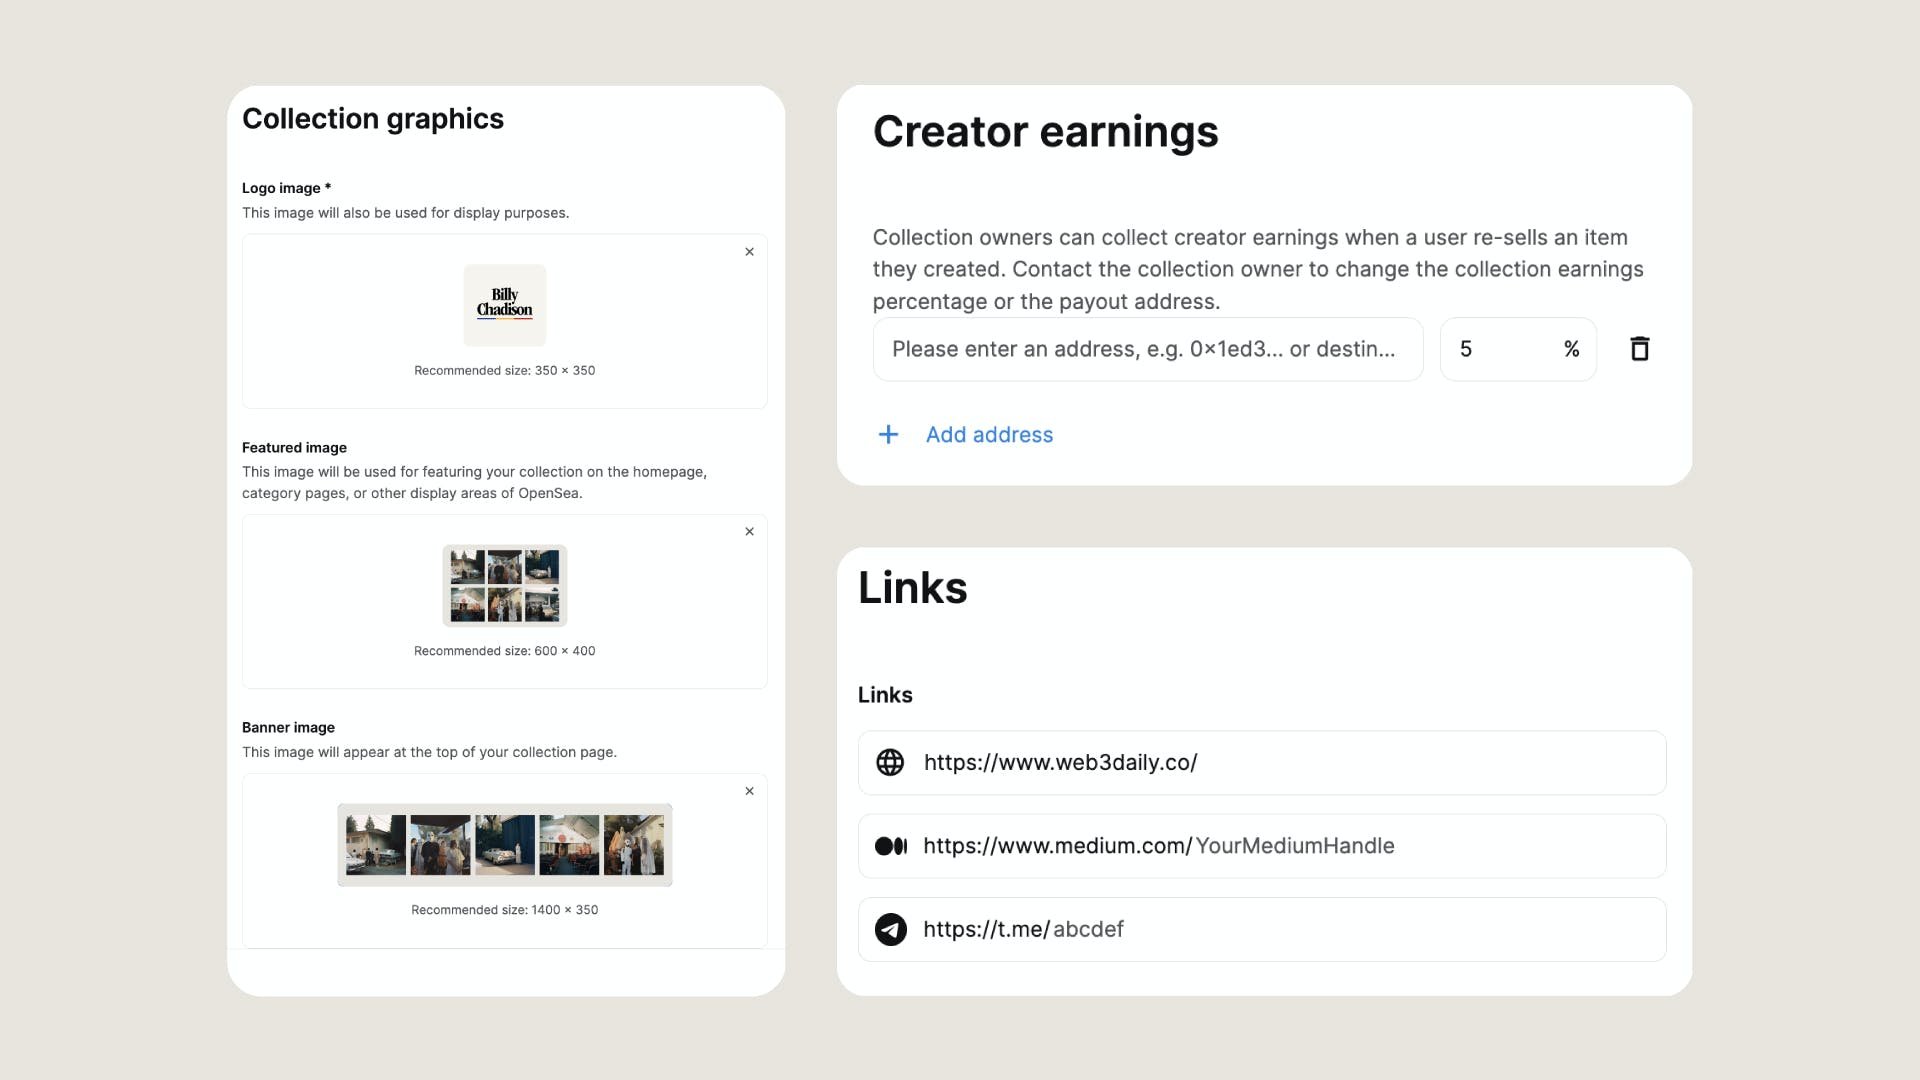
Collection Graphics, Creator Earnings, and Links.
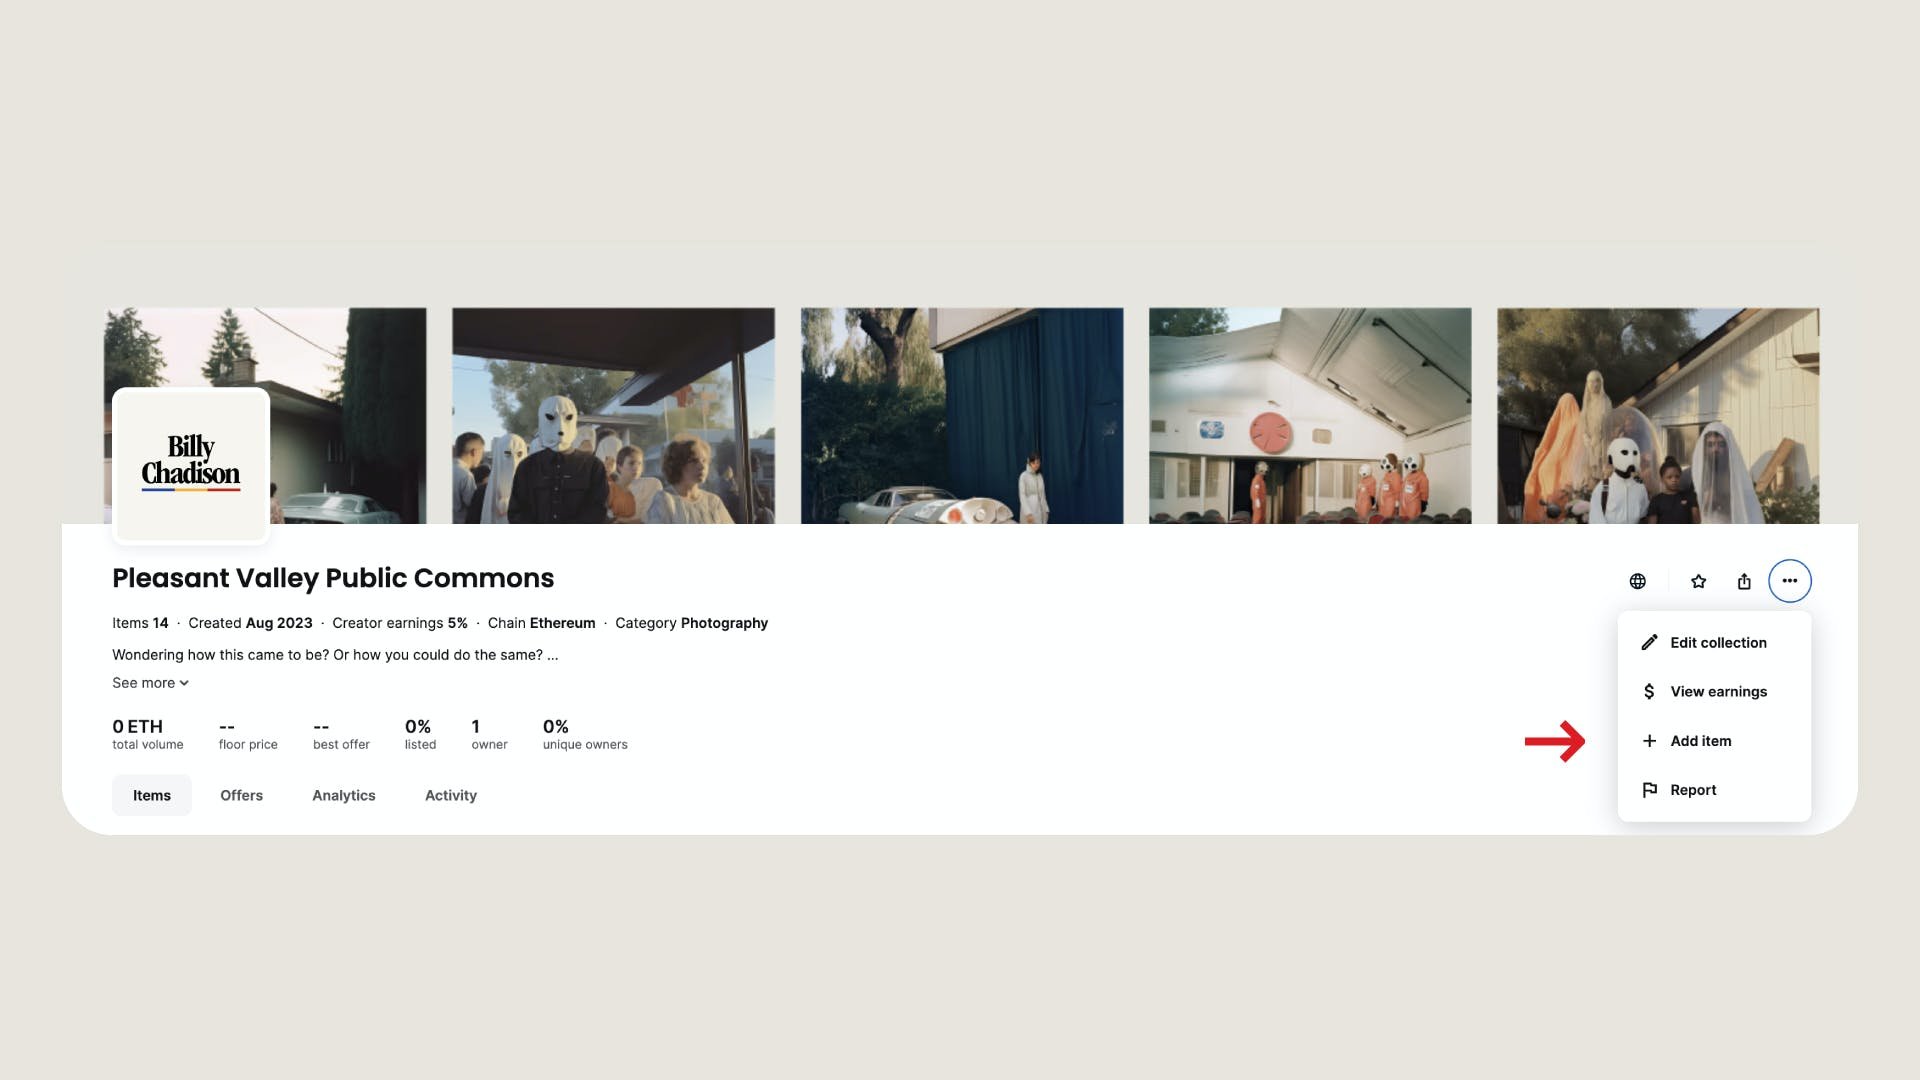
7. Went to the collection page, clicked the three dots in the far right and selected ‘+ Add item’
8. Created new item, with the following settings:

9. Navigated to the Item’s landing page, selected ‘List for sale’ and scheduled it, like so:

10. Rinse and repeat for all 30 releases.
Alright. Tools down, folks. It's time for some R&R - we’ve all earned it.
See you Monday for Part 9, where we cover social scheduling.
Follow on Twitter and Instagram for first looks on each NFT release.
Want a chance to win a 1/1 NFT at release? Enter here.
P.S. Want to try making your own AI images?
Sign up to our newsletter and invite a friend using the referral code in the welcome email.
You’ll then be invited to our Discord, where you’ll get free access to Midjourney (the AI tool we’re using for this project).